
Whether short film, commercial or music video: Every video is only as good as its preparation. We’ll explain how easy it is to create a storyboard and why test shots and a schedule are necessary.
1. Location, Location, Location: Scouting is key
No matter what the occasion, you should explore the lighting and sound conditions on location. Try to be there before the actual event takes place – preferably at the same time of day. If this is not possible, it is advisable to take test shots shortly before the actual start of shooting. This makes it easier to find the right settings and pans. Of course, there are also digital helpers for this: the website suncalc.org shows the position of the sun on a map depending on the date and time. Tip: Test shots are excellent as gap fillers (B-ROLL).
2. Schedule: What, When, Where
A schedule specifies when which material can be shot and when and where which equipment is needed – also depending on the lighting and sound conditions there. It is not a matter of a minute protocol, but merely of knowing what is happening, when and where as a cameraman – in order to organize yourself and your equipment accordingly. Is the occasion of the video a festivity or an event? Then it is also part of the schedule to inquire whether there are certain locations that are taboo for filming or vice versa: to find special spots that may only be entered for filming. It is also important to find out whether a filming permit is required.
3. Designing Stories: The Storyboard
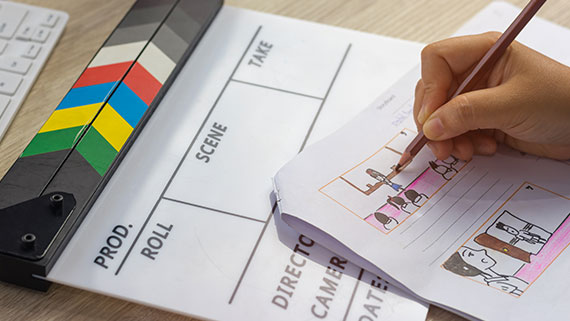
An event film that lasts as long as the occasion itself? Would be just as boring as a holiday film in holiday length. A good video tells a story, is entertaining, varied and easy to capture. That’s exactly what the storyboard is for – before shooting starts. The idea behind a storyboard is to work out the key scenes that will captivate the audience – captured like a sketch, similar to a comic strip. By thinking through each scene or shot and thinking about how to edit the video, you can save a lot of time creating the video. The film is filleted into sensory sections, scenes and individual shots – without drawing a flip book. Rather, it is about the most important moments, a narrative strand, the common thread: Turning points or intersections, changes of perspective, flashbacks or changing locations. Key scenes sketched in a rectangle. A film on a storyboard thus consists of a whole series of rectangular drawings.
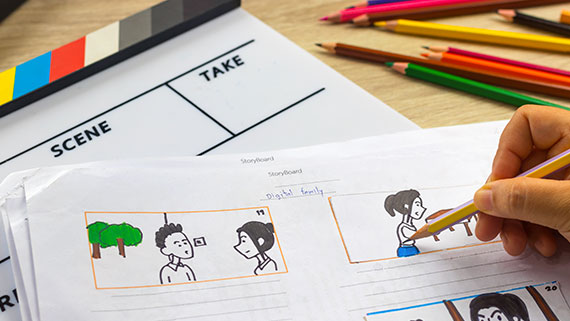
How to Simply Create a Storyboard
A simple storyboard is quickly drawn by hand – after all, it’s not about art, but about a practical instrument for storytelling. Simply draw a line of rectangles on a sheet of paper with a pencil and ruler in the same ratio as the later video – either 4:3 or 16:9. In a well-stocked craft or paper shop you can find already prepared sketch blocks. Those who prefer to work digitally can use online services such as www.storyboardthat.com, PowerPoint, Amazon’s Storyteller or any graphics editing program. Tip: There are 40 professional storyboard templates on the www.templatelab.com website.
Whether digital or on paper: each rectangle represents a key scene. Just imagine you see through the camera while looking at the rectangle on the storyboard. What would you see? As soon as what you see changes and those changes are relevant to the progress of the story, fill a new rectangle with a sketch. The storyboard sketches don’t have to look like a professional draughtsman’s sketches, but they should be good for imagining the look of the video scene. A few basics will help: Perspective, for example. People who should be further away from the camera should be drawn smaller and place their feet a bit higher up than people who should be closer to the camera. A grid pattern facilitates three-dimensionality – and the storyboard rectangle is divided into small squares. They ensure intuitive spatial perception.
The most important information is noted for each rectangle in order to get the best out of each key scene: How is the light? What’s in the foreground, what’s in the background? What is the picture detail, what is the colour spectrum? What angle is filmed (wide angle, close-up, over-the-shoulder, …)? Which props do I need? Who is in the scene? Which special effects do I want to use? Which editing technique do I want to use to lead to the next scene? Is there music that accompanies the recordings? Should a soundtrack be recorded? Where will the transitions be best between scenes?
The last question is very important, because to make a story come alive, it’s not enough just to go from one scene to the next. The editing should be planned. This is the only way to create an arc of tension. An example: The wedding ceremony is over; the wedding party leaves the church. After we briefly see wedding guests start to exit the church, a cut follows. In the next setting, we see quest congratulating the happy couple – in the background the church, the doors still open.
When the first version of the storyboard is ready – be sure to get feedback! The storyboard lives on the ideas of others or spontaneous changes directly on location during the shooting.

4. From Storyboard to Shotlist
The storyboard results in a recording list (“Shotlist”). This is a master list of the most important scenes – i.e. instructions on what the camera should capture. In any case, many details are included: For example, in a band appearance, close-ups of the hands gliding over the strings of a guitar or a foot stepping on a pedal. In addition to these shots, however, medium shots of the musicians are also important. By changing the settings and perspective, each video clip appears more dynamic.
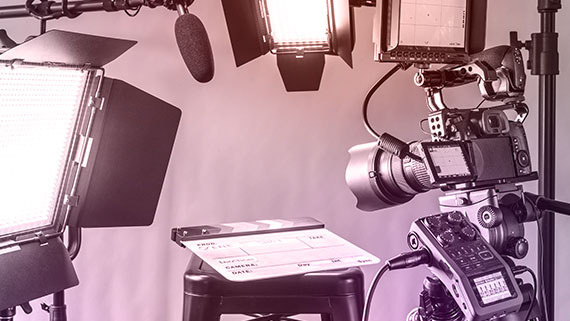
5. From the Shotlist to the Equipment needed
On the shooting day good hardware equipment is self-evident. In addition to the camera, tripod with bubble level, microphone including windscreen, LED daylight lamps, you should make sure to include replacement batteries, the corresponding cables and, if necessary, an extension in the luggage. Always good: a mobile “hair & makeup”-box with handkerchiefs, cotton pads, make-up remover tissues, powder of varying intensity and make-up brushes. Compulsory accessories: crepe tape for masking positions and gaffa tape (for all cases).
6. What else to think about?
- If you are going public, make sure you think through how individuals may find your video. You may want to add extra elements that identify the , company, or organization.
- Think about accessibility needs: do you have deaf or hard of hearing viewers? If you need captions, your video has to be transcribed.
- Is the video part of a series? If so, you may want to link the viewer to another video or content. Some players or video networks allow you to link directly
- If your video is a job, make sure, that you know brand colors, logos and images before production – the Corporate Identity.
- If you are going to have people in your video: be sure to prepare them. Explain your storyboard, share the script. Tell them what (not) to wear when on camera and whether you have concrete ideas for hair or make-up. You may need to have them sign a release agreement.
- If there’s a voice over: you have to give directions in pacing and style. Plus: You should also share your script.
GREAT, I LEARNED A LOT FROM THIS ARTICLE. AS WELL AS THE PREVIOUS ARTICLES. THANK YOU.
How about giving us something we can’t find with google elsewhere?
How about some Vegas or VMS tips and tricks ?