
Here’s a pop quiz for you: Can you name the four different places you can add video effects to your VEGAS Pro or VEGAS Movie Studio Platinum project?
Most people can easily name two, and some are fairly quick to name three, but don’t feel bad if you don’t get all four, because you’re not alone! Let’s take a look at video FX in VEGAS so that you have a complete understanding of the best place to apply an effect based on the result you’re after.
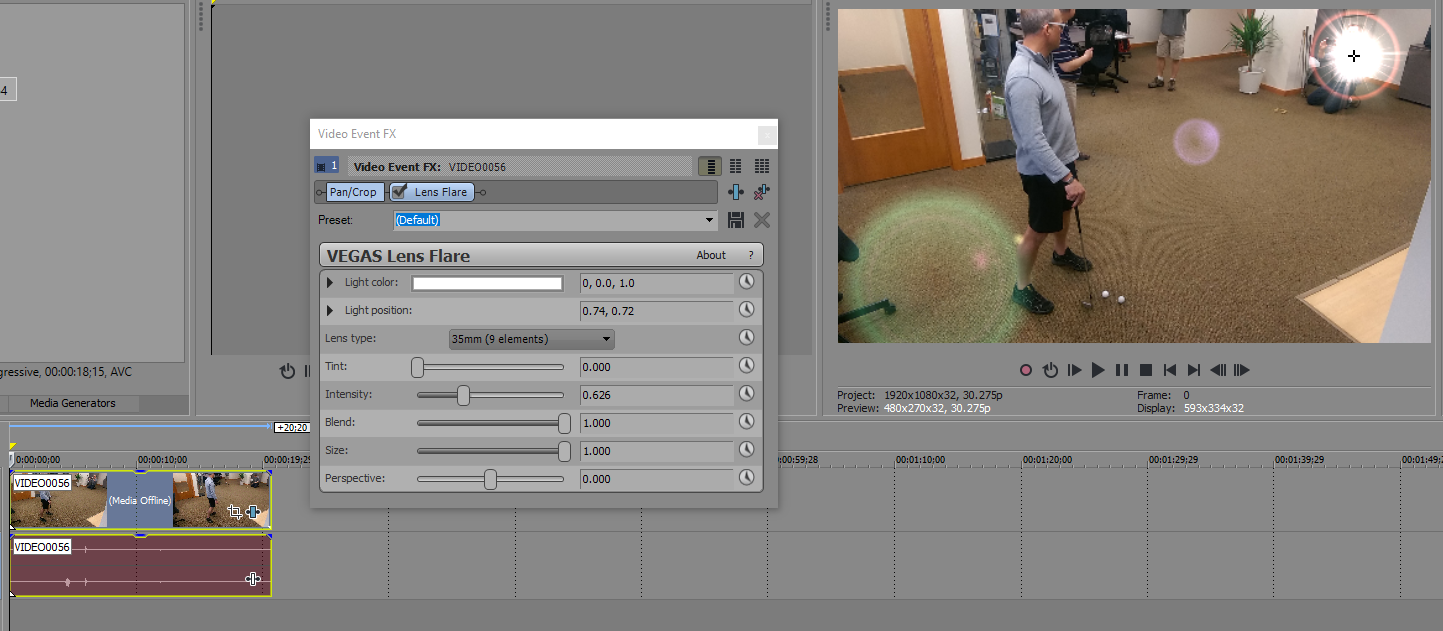
We might as well start with the easy one. Most users with even minimal experience in VEGAS know that you can apply video effects to each and every video timeline clip event, as in Figure 1. This technique works perfectly for those times when you have an effect you want to apply to just one specific piece of video in your timeline. For instance, maybe you have one shot that you think would really benefit from a lens flare. You can add the flare to the one clip event that holds that piece of media and it will affect only that one event. You can think of this as the most surgical method. With this technique, you target a very specific piece of your project. Of course, nothing stops you from adding that same lens flare to any other clip event in your project, but you pick and choose on a very granular level.
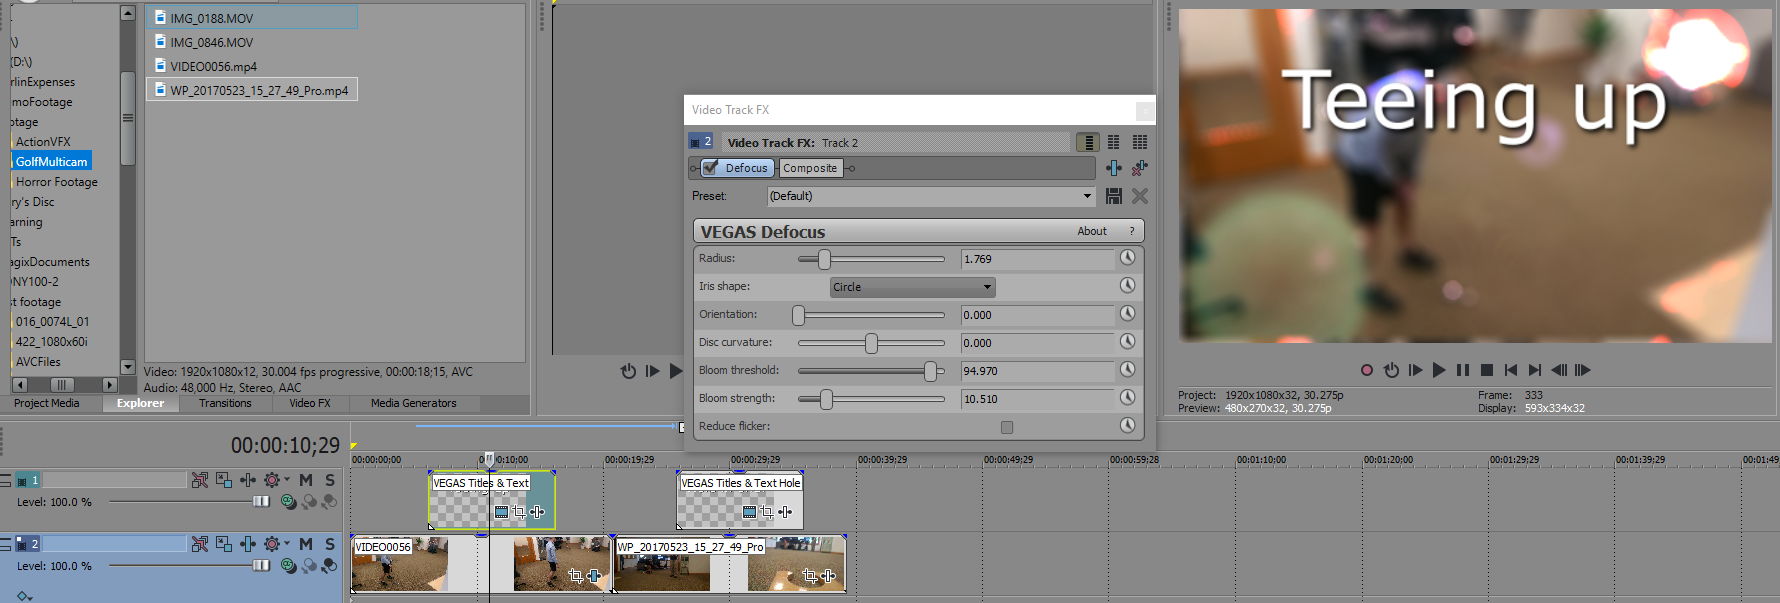
The next most obvious method, in which you add the effect to an entire track, gives you a tool for spreading an effect across a much broader range of clip events in your project. When you apply an effect on the track level, the effect acts upon every clip event you put on that track. For instance, say you have a series of title sequences and under each title, you will have video, but you want that video to always be blurred so that it doesn’t detract too much from the title. You can apply a blur effect to a track and then any video you add to that track throughout the length of your project becomes blurred according to your plug-in settings.
This spares you the trouble of applying that blur independently to each individual clip event on that track. Beyond that, and maybe even more importantly, say you have 50 of these events on your track. As you create the 51st, it suddenly occurs to you that you don’t like the blur you added and you want to tweak the parameters a bit. If you’ve applied the effect to 50 individual clip events, you have to go back to each one and make the adjustments—that could get time consuming! On the other hand, if you apply the effect at the track level, you can change it once and it updates the effect on all clip events on that track.
OK! With the obvious ones out of the way, let’s talk about a couple of methods that many users never explore, and learn why you might want to make them part of your workflow. Let’s set up a scenario. Say you shot an interview continuously for two hours and now you have to edit down into a 30-minute spot. You go through the footage, and out of the two-hour file, you trim out all the best clips that tell your story perfectly and add them to your timeline. Everything looks great except that as you review your work you realize that although the clips tell the story beautifully, they don’t don’t look as visually stunning as you’d like them to. You decide you need some color grading and correction on all of it. Since it was all shot in one long file, literally every one of these interview clips needs the same correction.
Obviously it won’t make much sense to add your color grading to every clip event individually—that could take an awfully long time. It might work to apply the grading to a track and then put all of these interview sections on that track, but what if for various reasons you need to spread the footage across multiple tracks? In that case, the track level won’t make for the most efficient workflow.
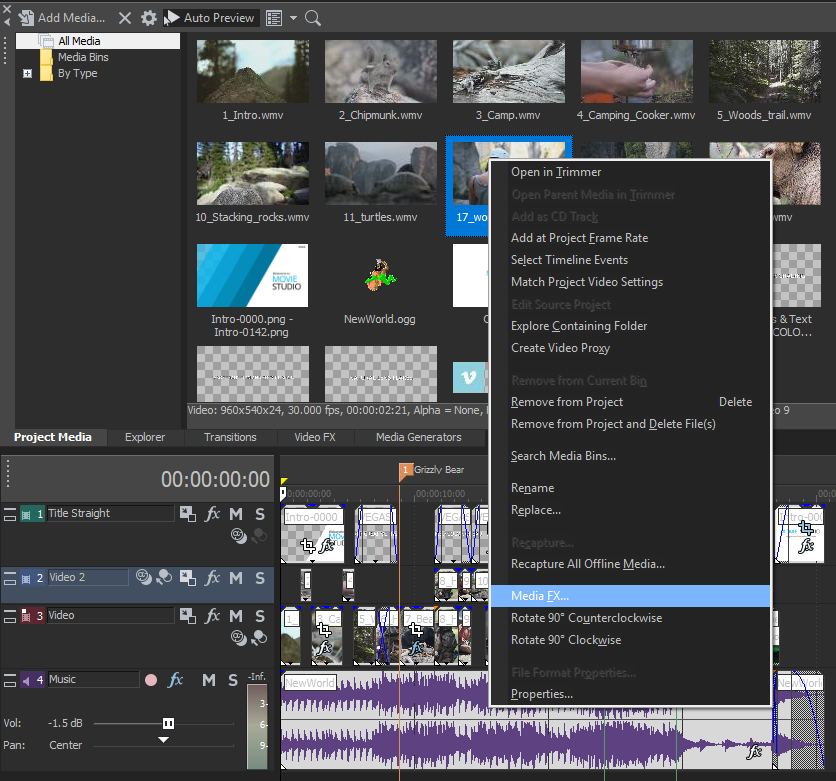
Instead, this scenario presents a perfect use of the ability VEGAS gives you to add effects at the media level. To do this, click the Project Media tab to bring that window to the front. Notice in VEGAS Pro that the button bar of the window features an FX button like the ones you see on clip events and track headers. Select the interview clip and click the Media FX button. In VEGAS Movie Studio, right-click the clip you want to add the effect to and choose Media FX from the context menu, as shown in Figure 3. Now choose the effect or effects you want and adjust the settings in the normal way. Now, no matter where you place this media clip (or any part of it) in your timeline, it will already have this color grading work complete for you. And, similar to track effects, if you decide to tweak your color grading later, you can do it for all of the events in your project simply by adjusting it once in the Media FX area.
Finally, while these three methods give you a huge range of flexibility, one more technique gives you control of every piece of video media in your project. This technique enables you to apply effects at the project video output level. Let’s say before you deliver your project for airing on your local television station, you need to conform to the station’s strict guidelines on broadcast levels. You can apply a filter—like the Broadcast Colors filter—to the video’s final output (called the video bus level) to ensure that nothing you did in your project pushes past the legal limits.
Notice in the button bar at the top of the Video Preview window that you find another FX button. Click that button and it leads to all of the video effect options. Add a filter and adjust its parameters in the normal way. Whatever you add at this level gets applied to absolutely every piece of video in your project. Nothing escapes to your final file without going through the plug-ins that you apply at this stage.
These four levels give you unparalleled power for applying video effects. And although they are all separate, they are not mutually exclusive. In other words, nothing stops you from applying an effect to a clip event that holds a piece of media that also has an effect on it and sits on a track that has another effect chain on it in a project that runs all of the video output to a video bus effect before rendering. And given that you can chain up to 32 plug-ins together at each one of these different levels…well, you can see that you’ve got more room for video effects than you’ll probably ever use! But in the normal course of your edits, you’ll find many times when you run a single clip through effects at more than one of these levels.
So there they are: the four levels at which you can apply video effects to your project. But before we wrap this up, wonder if you’ve added effects at one level, and later you decide they’d make more sense at a different level? For instance, say you added effects to an event, but then realize you need the same effect on every event on the track. Do you have to recreate everything you’ve done to the event on the track? Of course not!
You can save the settings of any effect as a custom preset and then call that preset later. For instance, in the example above, you’ve added an effect to an event, and presumably adjusted the settings of that effect to get exactly the look you’re after. If you now decide you want that same effect on the entire track, click the name of the current preset (unless you’ve changed it, it is Default) to select it, and then type a new name, like MyPreset. Now, add that same effect to the track level and click the Preset drop-down list. Notice that among the list of presets is the one you just created: MyPreset. This shows that presets you create at one level become available at all other levels for easy access.
We can even go one step further. What happens is you have a chain of 10 filters applied to the event? It would take a long time to create new presets for each, then apply each to the track, and finally choose the new presets for the track effects. So instead of all that, you can save the entire chain of presets and apply that to the track level. To do that, click the Plug-in Chain button in the Event Video Effects window. This opens the Plug-in Chooser window and just below the window’s title bar you see the effects chain. You can make adjustments to the chain here if you’d like. But in our case, we just want to save the chain so we can easily apply it at the track level. To do that, click the Save As button. In the Save Plug-in Package window, give your new package a name—like MyChain—and click OK. Then click OK to close the Plug-in Chooser.
Now that you have a new Plug-in Package, it’s easy to apply it to any of the other levels. Open the Plug-In Chooser and select Filter Packages from the list of folders at the left. You new package now appears in the contents of the folder on the right. Select it and click the Add button. Click OK and you’ve successfully added the custom chain to your track.
You can see that you have a ton of options and flexibility when it comes to video effects in VEGAS Pro. When you understand where you can add effects, you soon begin to develop a true understanding of when one location makes more sense than the others. And once you understand that, you really begin to leverage the unequaled power of effects in VEGAS!
Must-try Video Effects to Add Your Videos
Learn more about what’s possible by finding tons of fascinating effects ideas to transform your video projects into true masterpieces quickly and easily.
Great job! I totally didin’t know you could add FX to the media clips. Nice!
A 5th place you can add fx is on the parent level of a group of tracks – a Composite grouping. Just make various tracks be “children” of the parent track and apply the effect to the parent – now all tracks will have the same effect applied.