In the last article, we discussed the first 10 of 20 techniques you can use to better organize your workspace. This time, we’ll take a look at ten more techniques, that we use.
Technique Eleven:
Adjust track height
There are several methods you can use to adjust the height of tracks either individually or all together. This can be very helpful when you need to take a closer look at the track you’re focused on or want to set aside other tracks in a minimized state when you don’t need them.
To change track height, you can:
- Click the track’s Maximize Track Height and Minimize Track Height buttons
- Drag the bottom edge of the track header up or down
- Press the Tilde key on your keyboard to minimize all track heights and press it again to expand the tracks again, or
- Click a track’s header, hold Ctrl+Shift+Up/Down Arrow to change all track heights simultaneously until all heights match
Technique Twelve:
Expand track layers
When you use more than one event on a single track, VEGAS Pro gives you the ability to view the track in a couple of different ways. By default, all of the events sit sequentially on a single layer of the track, one after the other. Crossfades and transitions are represented by an overlapping of two events.
However, some editors like to split alternate events across two separate track layers and you can do this in VEGAS Pro. First put two events on the same track and overlap them in order to create a crossfade. Now, right-click the track header and choose Expand Track Layers from the menu.
This splits the track into three separate layers: one for the first event, one for the second event, and a third to represent the transition between the two events. Every new event you add to the track will alternate between layers A and B.
The project looks the same on playback regardless of whether you’ve expanded track layers like this or left them collapsed as they started out. To collapse the layers again, choose Expand Track Layers from the menu once more.
Technique Thirteen:
Default track properties
Each track in your project has several different properties. After you’ve worked with the software for a while, you may find that you set your tracks to certain properties over and over again. If this is the case, you can set many of your favorite track properties as the default for all new tracks you add to your project from now on.
To do this, right-click a track that has the properties you want to use as defaults and choose Set Default Track Properties from the menu. The Set Default Track Properties dialog box shows two columns of properties that you can select to set as defaults—one for audio tracks and one for video tracks. For instance, say the track you clicked has the track height you want to use as a default. In that case, select the Height checkbox. Note that if you want to set track properties back to their defaults, select the Restore original defaults checkbox. For now, leave that checkbox deselected. Once you’ve selected all of the properties you want to set as defaults, click OK.
Now add a new track of the same type to your project. The new track appears as usual but now has your new default track property settings.
Technique Fourteen:
Display preferences
Long-time users of VEGAS Pro remember when the timeline was at the top and the window docking area at the bottom. You can switch the user interface to look just like it did back in the old days. To do this, choose Options | Preferences and click the Display tab. Deselect the Display timeline at bottom of main window checkbox. Click Apply.
If you’re really nostalgic for the old days, you can also set VEGAS Pro back to the lighter color scheme that it used for its first several versions. To do this, deselect the Use VEGAS color scheme checkbox. Click Apply. A message box informs you that you’ll have to exit and restart the application for this change to take place. Click OK and OK again to close the Preferences dialog box. Exit the application and start it again. When it comes back up, it uses the brighter color scheme of the first several versions of VEGAS Pro.
To set all of these preferences changes back to their defaults, choose Options | Preferences again. Click the Display tab and then the Default All button. Click Apply. You’ll have to exit and start the application one more time.
Technique Fifteen:
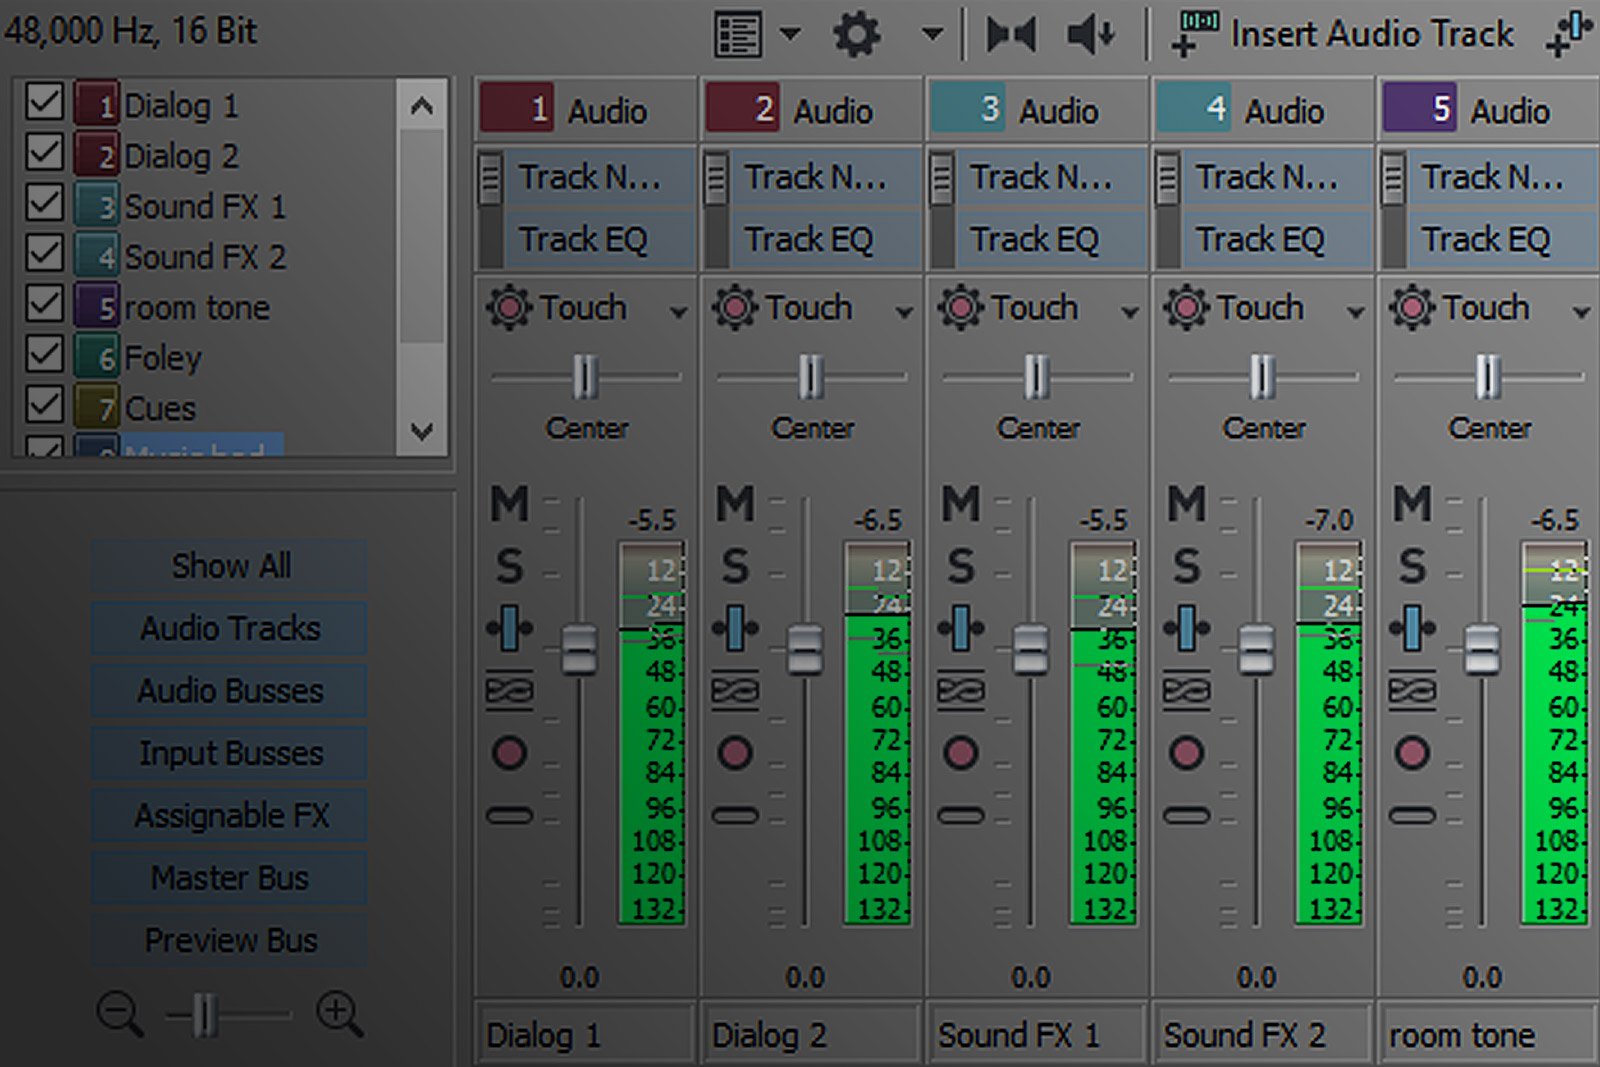
The Mixing Console
VEGAS Pro features sophisticated audio mixing tools such as volume and pan adjustments, mute and solo tools, effects tools, and so on. These tools appear either in the track header area or in the Mixer window. However, if you’re working on an audio project, or doing audio-intensive tasks in your video project, you may prefer to have all of your mixing tools in one location. The Mixing Console window enables you to do just that.
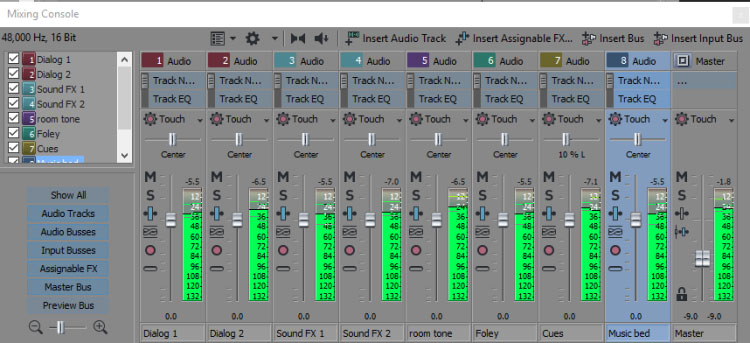
To view the Mixing Console, choose View | Window | Mixing Console. All of your track channels and bus channels appear in the Mixing Console in a traditional hardware-mixer-like view and you have great flexibility over precisely which tools you want to show or hide.
Technique Sixteen: Resizing windows
Sometimes when you open a window in VEGAS Pro, it isn’t exactly the right size for the tool it holds. This is because many different tools share the same basic window shell. For example, add the Black and White filter from the Video Event FX window to an event on your timeline.
This filter has only one control. If the last filter that you used in your project had many more controls, the Video Event FX window may be much larger than it needs to be in order to show this control. To resize the window, drag any of its edges in or out to create less or more room inside the box.
Even better, to instantly resize the window so that it is exactly the size it needs to be in order to make all of the controls visible, double-click the window’s title bar. Now, add the Color Corrector (Secondary) filter to the same event. The window is far too small now to show all of the controls in that filter. Double-click the Title bar again to resize the window.
Technique Seventeen:
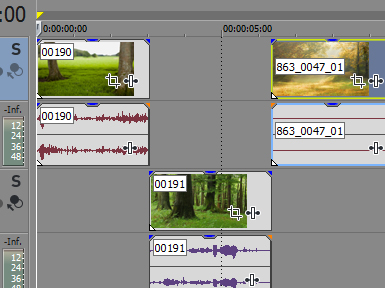
Show active take information
When you have a lot of different media in your project or when you’re using many different takes in events, it can get confusing trying to know exactly what files you’re currently using on the timeline. You can make life a lot easier if you show the active take information.
To do this, choose View | Active Take Information. Now the name of the files that are being used in every event on your timeline appear in the upper-left-hand corner of each event.
Technique Eighteen: Clean your project media
Every time you add a file to your timeline, a reference to that file is added to the list in your Project Media window. Even if you later delete a file from your timeline, it remains in the project media list in case you want to use it later. Eventually you can end up with many files in your media list that you didn’t end up using in your project. To avoid confusion, you can quickly clean these files out of the list.
To see this, add several files to your project. Click the Project Media tab if you need to in order to view the list. Notice that all of the files appear in this list. Now, delete a couple of the files from the timeline. Even though they’re gone from your timeline, they still appear in the project media list. Set your Project Media window to Details mode and notice that those deleted files have a use count of 0.
To remove an individual file with a 0 use count, right-click the file in the Project Media list and choose Remove From Project from the menu. To simultaneously remove all files with a 0 use count, click the Remove All Unused Media From Project button.
Technique Nineteen:
Customize your toolbar
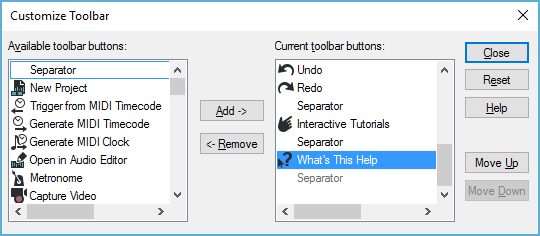
If you like to access operations with a button in the toolbar you can rearrange the buttons in the bar to better fit your working style. Choose Options | Customize Toolbar. In the Customize Toolbar dialog box click the What’s This Help entry from the list of Current toolbar buttons. Notice that in the list this button appears after a Separator which appears between this button and the Interactive Tutorials button above it in the list. Look at the button in the button bar and notice that the Separator does indeed separate these two buttons.
Now, click the Move Up button in the Customize Toolbar dialog box. This moves the What’s This Help button above the separator and in the toolbar you can see that there is now no separator between the two buttons. Click the Move Up button again to position this button before the Interactive Tutorials button. Look at the toolbar to see the new position. In this way you can reorder all of the buttons in the toolbar. Use the Move Down button to place the button back into its original position.
Now, click the Remove button. This removes the button from the Current toolbar buttons list and places it into the Available toolbar buttons list. You can see that the button no longer appears in the toolbar.
With the What’s This Help button selected in the Available toolbar buttons list, click the Add button. This puts that button back into the Current toolbar buttons list. If it doesn’t return to its original location, use the Move Up and Move Down buttons to reposition it as necessary.
Using all of these techniques, you can arrange the toolbar to hold whatever buttons you use most in whatever order works best for you. If you’ve been experimenting and want to return to the default button bar configuration, click the Reset button. When you’re done, click Close.
Technique Twenty:
Adjust your grid spacing
The VEGAS Pro grid gives you guides that you can use to know where you are in your project and to place objects on your timeline exactly where you want them. The default grid spacing is called Ruler Marks and you see a grid line at about every 10 seconds when you’re zoomed all the way out of your project. The grid adjusts in reaction to your zoom level. To see this, use your mouse wheel to slowly zoom into the timeline. When you zoom far enough in, the grid lines adjust to every five seconds. Keep going and the grid lines appear every two seconds. If you go far enough, eventually the grid lines will appear on each individual frame. Now zoom all the way back out.
Sometimes, it might be helpful to have the grid lines remain consistent as you zoom in and out. Choose Options | Grid Spacing. From the pop-up menu you can choose whatever spacing works for the task you’re trying to accomplish. For example, choose Seconds from the list. Now you see many more grid lines in the timeline. Zoom in. As you do, notice that the grid lines never mark anything other than each second in the timeline.
You can also set VEGAS Pro up to use these grid marks as snap objects. To do that, choose Options | Snap to Grid.
And finally, a bonus 21st technique.
Bonus Technique Twenty-one:
Grouping tracks
You can create groups of tracks in VEGAS Pro. This is a great way to keep related tracks together and organized in your project workspace. To group tracks, select the first track you want in the group. Hold the Ctrl key and select each other track you want to include in the group. Keep in mind that in order to group tracks, they must be a continuous range of tracks. In other words, you can group tracks 1, 2, 3, 4, and 5, but you could not group tracks 1, 2, 3, and 5 without track 4.
Right-click any of the selected tracks and choose Track Group | Group Selected Track. The tracks now belong to the same group. You can collapse the group to gain valuable timeline space. To do so, click the Close Track Group button for the track group header. Click the button again to reopen the group.
Clearly there are many different techniques you can use to organize your workspace in VEGAS Pro and other VCS applications. And there may be techniques that we neglected to talk about in this article that you’ll find helpful in organizing your workspace. All of these tools help you work faster and more efficiently. They help you configure the application so that it works with you instead of against you on any job you’re working on.